| Expand | ||
|---|---|---|
| ||
Before Your Class:
In Class Procedure:
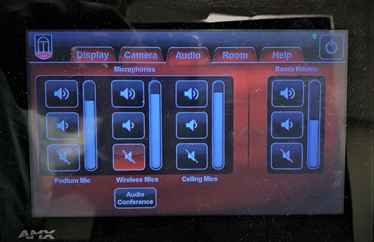
Audio Settings: Within the classrooms, these are the appropriate selections for audio. These should be preset. If you have audio problems, please check these Zoom settings. If audio is still not working, please use the classroom control panel. Audio follows the last “pick & poke” action you took. If you used “pick & poke” to blank one of the projectors, that will also mute the audio. To enable audio, “pick & poke” a monitor to one of the projectors or the confidence monitor. Watch the video of the pick & poke interface. Security Settings To avoid these disruptions during your lecture we recommend the following security settings:
Participants Settings
Chat Settings: We have set restrictions so that participants cannot send messages to each other, but they may send chat messages that are seen by all. If you wish to restrict this further, you could restrict students to send chat only to yourself (Host Only). Sharing Computer Sound: If you are playing a video or something else with sound from your computer and you need the participants to hear it , then enable “Share Computer Sound”. |
...
| Expand | ||||||
|---|---|---|---|---|---|---|
| ||||||
To utilize the DocCam for the Zoom session, you will need to change the source of the video feed and turn off Mirrored Image. Do this through the Zoom interface.
If you need to alternate the view between the classroom camera and the Hovercam, you will need to switch back and forth between AV Bridge (classroom cameras) and the Hovercam. Watch video of switching cameras. Also select Video Settings which will bring up this inteface: Deselect “Mirror my video”. This will ensure that the image projected within the classroom is oriented properly for the students in the classroom. Students at a distance will see the Doc Cam image properly regardless of this setting.
|
...
| Expand | ||||||||||||
|---|---|---|---|---|---|---|---|---|---|---|---|---|
| ||||||||||||
Unfortunately, Zoom does not record multiple monitors simultaneously. You will need to switch the screen share between the two monitors or move all applications to a single monitor and bring the windows to the front as needed for the lecture. Watch video of changing monitor in Screen Share. Watch video of switching windows focus on single monitor.
|
...
| Expand | ||
|---|---|---|
| ||
See teaching set ups and options in low-tech (no podium PC or cameras) and in fully integrated spaces with video conferencing options.
|
| Expand | ||
|---|---|---|
| ||
Note: This application is only available in BLC classrooms. This is not a synchronous tool. Students will not be able to attend the live class. This solution is meant to record the class and make it available immediately after. FIRST STEP: Login to https://media.online.uga.edu/ and log in with Myid and Password if you are not sure you have ever used Kaltura. Doing this creates your id in the system. In the Classroom:
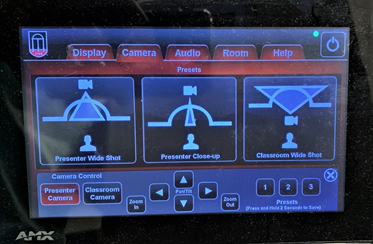
Camera Settings on the Touch Panel
Launch Kaltura Classroom
Input Settings There are multiple options and choices for selecting recording inputs. You may configure up to four devices, screen or camera, as inputs. In the Kaltura Lecture Capture Home Page, the default selection is a camera as the Primary Video and the screen as the Secondary Video. You can use the settings to configure the quality of recording, or choose a different recording input. You can either remove inputs completely or disable them for a specific recording by clicking on the input icon. By default, all inputs are configured to the highest quality available, so you can just start recording. If you would like to change any of the settings for the camera, screen or audio, please use the following information to modify the configuration settings. Check Your Audio Settings
Check Camera Settings
Record Your Lecture:
Completing and uploading video recording
Saving and Uploading your Recording
|
| Expand | ||
|---|---|---|
| ||
Attendance groups for Fall 2020 will be up to instructors to assign. However, some units may decide to assign en masse. One tool to assist in the management of these groups is the eLC groups tool. For example, groups can be set to self-enroll. You can share communication and resources with these groups via the groups discussion board. Also, see this resource on sign-up sheets in eLC. Watch the quick video tutorial. |
| Expand | ||
|---|---|---|
| ||


