...
Using Kaltura Personal Capture
...
- Install Kaltura Personal Capture:
...
Installation
...
- Review recording options and select your preference. Consider student population, instructional content, and bandwidth required for delivery when selecting an option.
...
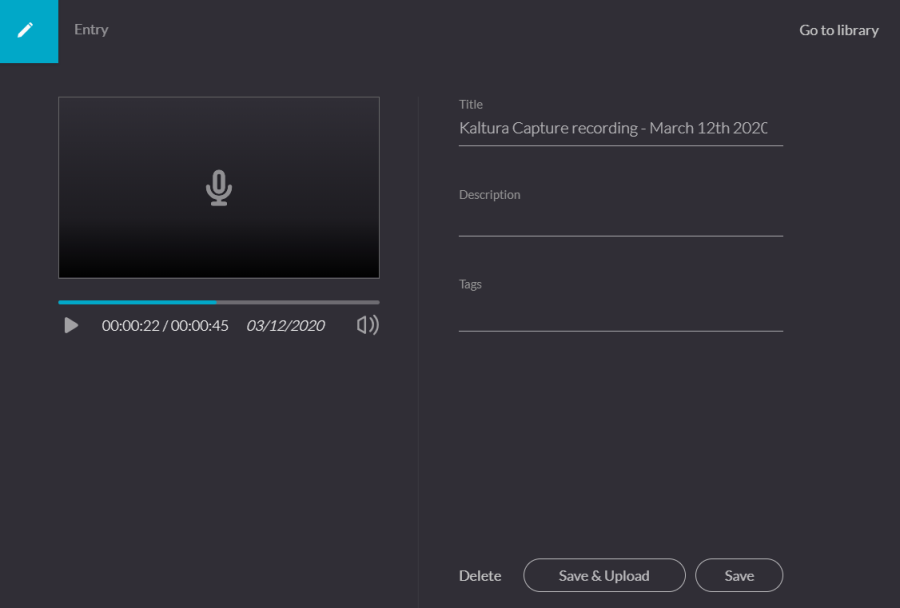
- Delete to delete your entry.
- Save and Upload to upload to Kaltura MediaSpace.
- Save to save to your local Library only. You will be able to upload at a later time from your media library.
- Start a new recording - you will be prompted with a confirmation that you indeed want to leave.
- Playback your recording.
- When you Save a recording without uploading it, the Management window opens with the Edit tab and displays the options to upload or delete your media. You can also select delete all uploaded to delete all uploaded media files from your local storage.
- Click upload. A pending status is displayed and a successful upload message appears when the upload is completed.
- Saving and Uploading your Recording
- After you "Stop" recording, the following message is displayed.
- The process of uploading your recording to MediaSpace is seamless. The following message is displayed: "The final message that your recording was saved successfully."
- All the recorded videos are stored locally in your recordings directory. If you have not changed the recordings directory during the installation, the default recording directory is C:\ProgramFiles\Kaltura\Capture\Recordings.
- Your recording is automatically uploaded to your Kaltura account (same as your MyID account).
- Upload is done in the background regardless of the user that is logged in. After you save your recording, you can start a new one or log off and the recording will continue to upload.
- When you "click here" in the successful upload screen, you are automatically directed to your Kaltura MediaSpace.
- Viewing the Kaltura Personal Capture Recording in MediaSpace
- Navigate to MediaSpace (media.online.uga.edu) and log in using your MyID and password.
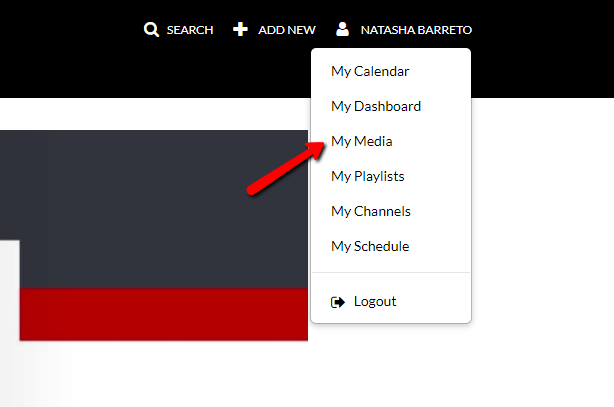
- Select your User Name from the top right corner and press "My Media." All your videos created with Kaltura will be listed there once the upload is complete.
- Adding recordings / and login using your UGA credentials
- Select "Add New" and "Record a Presentation"
- Follow the links to download Kaltura Capture for Windows or Mac
- Complete download steps.
Record a Session
- Visit https://media.online.uga.edu/ and login using your UGA credentials
- Select "Add New" and "Record a Presentation"
- The Kaltura Capture client will launch on your desktop
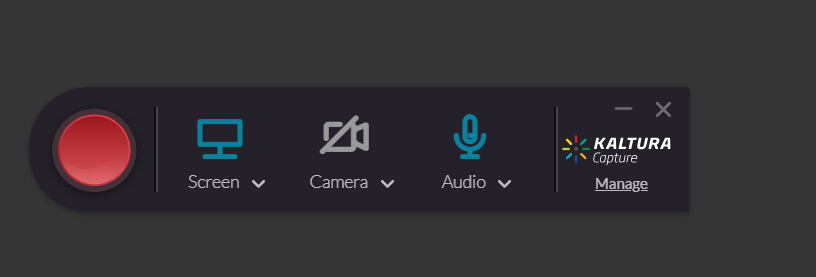
- Set up your recording
- Click the icons to turn the screen, camera, or audio sharing ON or OFF.
- Click the dropdowns under the icons to define the screen(s) displayed and camera/audio source.
- Additional settings can be defined under the "Manage" link
- To begin recording, click the Red record button.
- The recording progress window will appear. This window can be minimized or dragged to a different area of your screen.
| Anchor | ||||
|---|---|---|---|---|
|
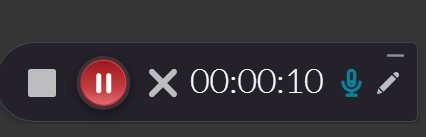
- To pause a recording, click the red button. To restart, click the red button again.
- To finish recording, click the grey square button. You will be prompted with an "Are you sure…" message.
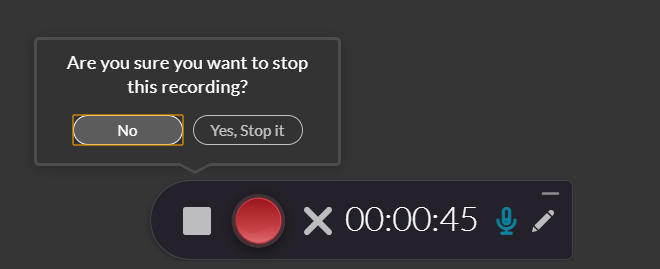
- After choosing "Yes, Stop it" you will be prompted to review your recording, add recording details, and will have options to Delete, Save & Upload, or Save (local copy only). Once you are satisfied, choose "Save & Upload". Your recording will be saved to your Kaltura Capture library and will be available to load to eLC.
Add a recording to eLC
- Navigate to your course in eLC
...
- Select "Content
...
- "
- Navigate to a module
...
- Select "Upload/Create"
- From the drop-down, select "Create a File"
- Enter a
...
- title for the
...
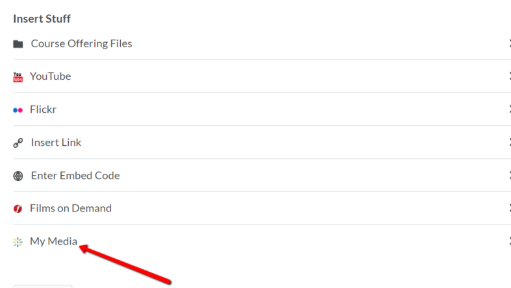
- recording and select the "Insert Stuff" button
...
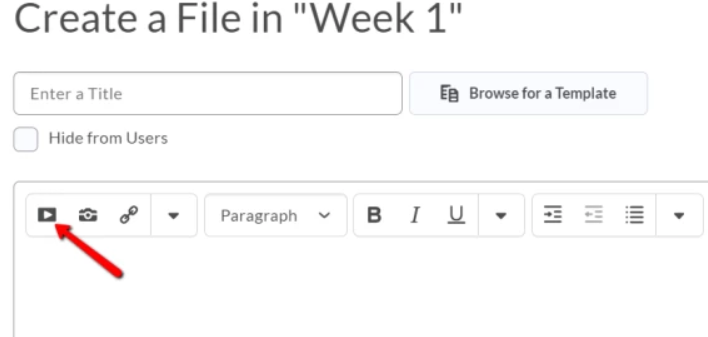
- Select "My Media"
...
- , your library of uploaded recordings will be displayed.
- Click "Select" next to the
...
- recording you would like to
...
- upload.
...
- Select "Insert
...
- "
- Select "Save and Close
...
- "
...