Using Kaltura Personal Capture
Using Kaltura Personal Capture
Installation
- Visit https://media.online.uga.edu/ and login using your UGA credentials
- Select "Add New" and "Record a Presentation"
- Follow the links to download Kaltura Capture for Windows or Mac
- Complete download steps.
Record a Session
- Visit https://media.online.uga.edu/ and login using your UGA credentials
- Select "Add New" and "Record a Presentation"
- The Kaltura Capture client will launch on your desktop
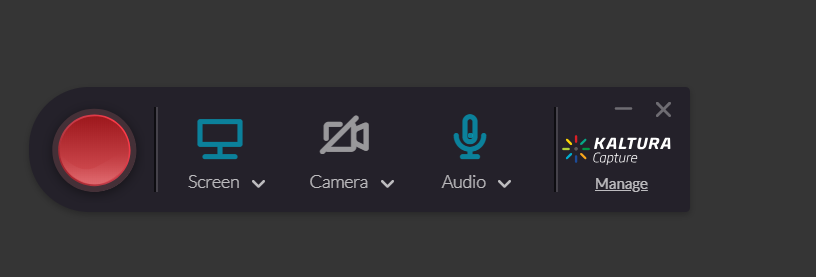
- Set up your recording
- Click the icons to turn the screen, camera, or audio sharing ON or OFF.
- Click the dropdowns under the icons to define the screen(s) displayed and camera/audio source.
- Additional settings can be defined under the "Manage" link
- To begin recording, click the Red record button.
- The recording progress window will appear. This window can be minimized or dragged to a different area of your screen.
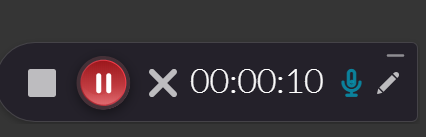
- To pause a recording, click the red button. To restart, click the red button again.
- To finish recording, click the grey square button. You will be prompted with an "Are you sure…" message.
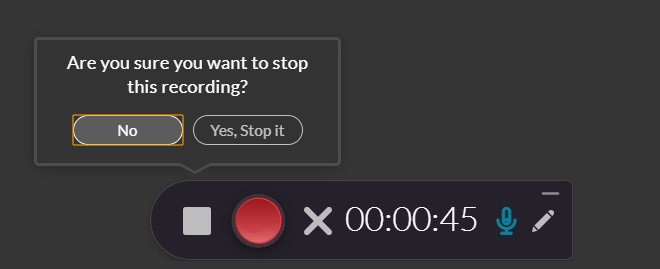
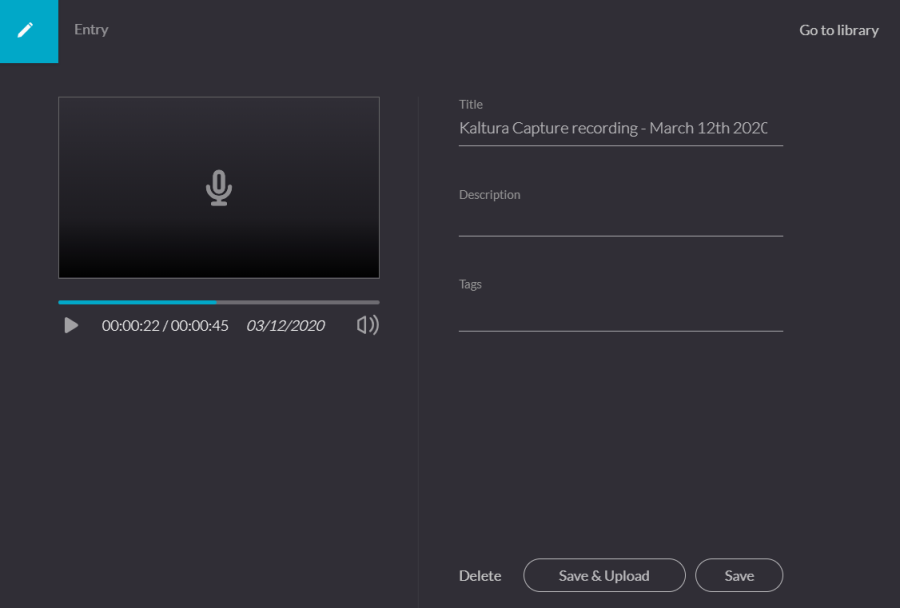
- After choosing "Yes, Stop it" you will be prompted to review your recording, add recording details, and will have options to Delete, Save & Upload, or Save (local copy only). Once you are satisfied, choose "Save & Upload". Your recording will be saved to your Kaltura Capture library and will be available to load to eLC.
Add a recording to eLC
- Navigate to your course in eLC
- Select "Content"
- Navigate to a module
- Select "Upload/Create"
- From the drop-down, select "Create a File"
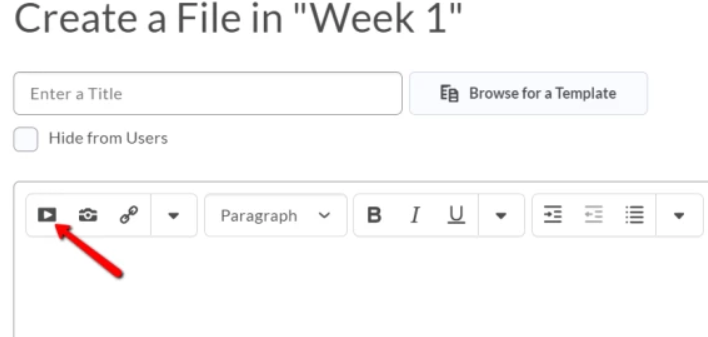
- Enter a title for the recording and select the "Insert Stuff" button
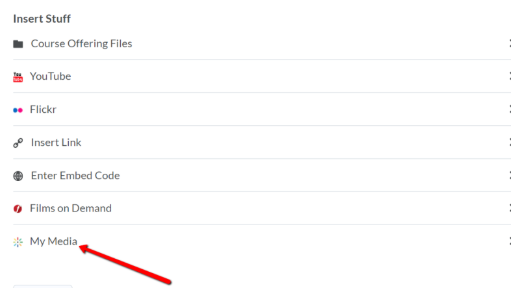
- Select "My Media", your library of uploaded recordings will be displayed.
- Click "Select" next to the recording you would like to upload.
- Select "Insert"
- Select "Save and Close"
, multiple selections available,